Showing posts with label finished quilt. Show all posts

Wednesday, July 20, 2011

back, with a finish

I know! It's been forever! I have been doing a little bit of sewing this summer, and here's a recent 'big finish'.

I've been a member of the do. Good Stitches bee for the last 9 months or so, and have been having fun being a stitcher, making blocks for the Faith circle. A couple months ago, I also joined the Inspire circle (making quilts for my favorite charity - Project Linus), but this time as a quilter. Being a quilter means you get to choose a design, collect the blocks and assemble the quilt. My month was May, and I chose this beautiful quilt by Amy of Diary of a Quilter as my inspiration:


To make up for all the girly and toddler quilts I usually make for Project Linus, I wanted to make something for an older boy. I asked for blue and brown square-in-square blocks, with a touch or green and gray. They were to be either 12.5" or 6.5" square, or a mix of the two sizes. The members of my group made some really wonderful squares for me! To make it a larger quilt (those teen boys are big!), I made the equivalent of 7 more blocks (though most of them were 6.5" blocks, so let's say 2 big blocks, and 20 small ones). The final dimensions were about 54" by 72". It was pretty addictive to go through my scraps and stash, and to use fabrics I wouldn't normally pick out or put together. What a great stash-buster project!


As you can see, my layout is a lot more regular than Amy's was. I tried to do a random layout, but I just couldn't get it to look right! So, I gave up, and went for a more regular one. With all the variety in the blocks, it still looks pretty random! Many thanks go to Chara for helping me with the layout!

For the back, I used a large piece of this fantastic Katie Jump Rope fabric. I had picked it up at a Project Linus meeting, long before I planned this quilt. It was perfect! I bordered it with a medium gray - it doesn't quite match the lighter gray in the KJR fabric, but close enough!


I based the quilting on the diagonal print of the KJR print. After basting (using spray basting, as usual!) I took a kid's washable marker, and used a ruler to extend the diagonal lines into the border fabric. After that, I quilted it from behind. I've used this technique before, and I highly recommend it. It's super quick, and looks great from the front.


Sorry these photos kinda suck - I finished the quilt the morning of our monthly meeting, and was in a rush to get the photos taken so I could run off to donate it!


I wanted to do something special for the label, more than just the standard tag. The text reads "This quilt was stitched with lots of love, especially for you, by the members of the "Inspire" circle of the "do. Good Stitches" bee on Flickr.com, May 2011. We hope it keeps you cozy!"


I'm also pretty darn proud of myself for finishing it on time - the bee rules say you should finish the quilt within 30 days of receiving all the blocks. I think I got my last block in the middle of June, and the quilt was donated on July 10. Yay for me!!

Thursday, February 17, 2011

the winner, and another strippie

The lucky winner of the pink charm squares is #40, and that's Sue of Sue's Quilting Haven. Looks like she's been having quite the winning streak lately! I was pleased to see the Project Linus badge on her blog - it's always nice to meet another 'blanketeer'!

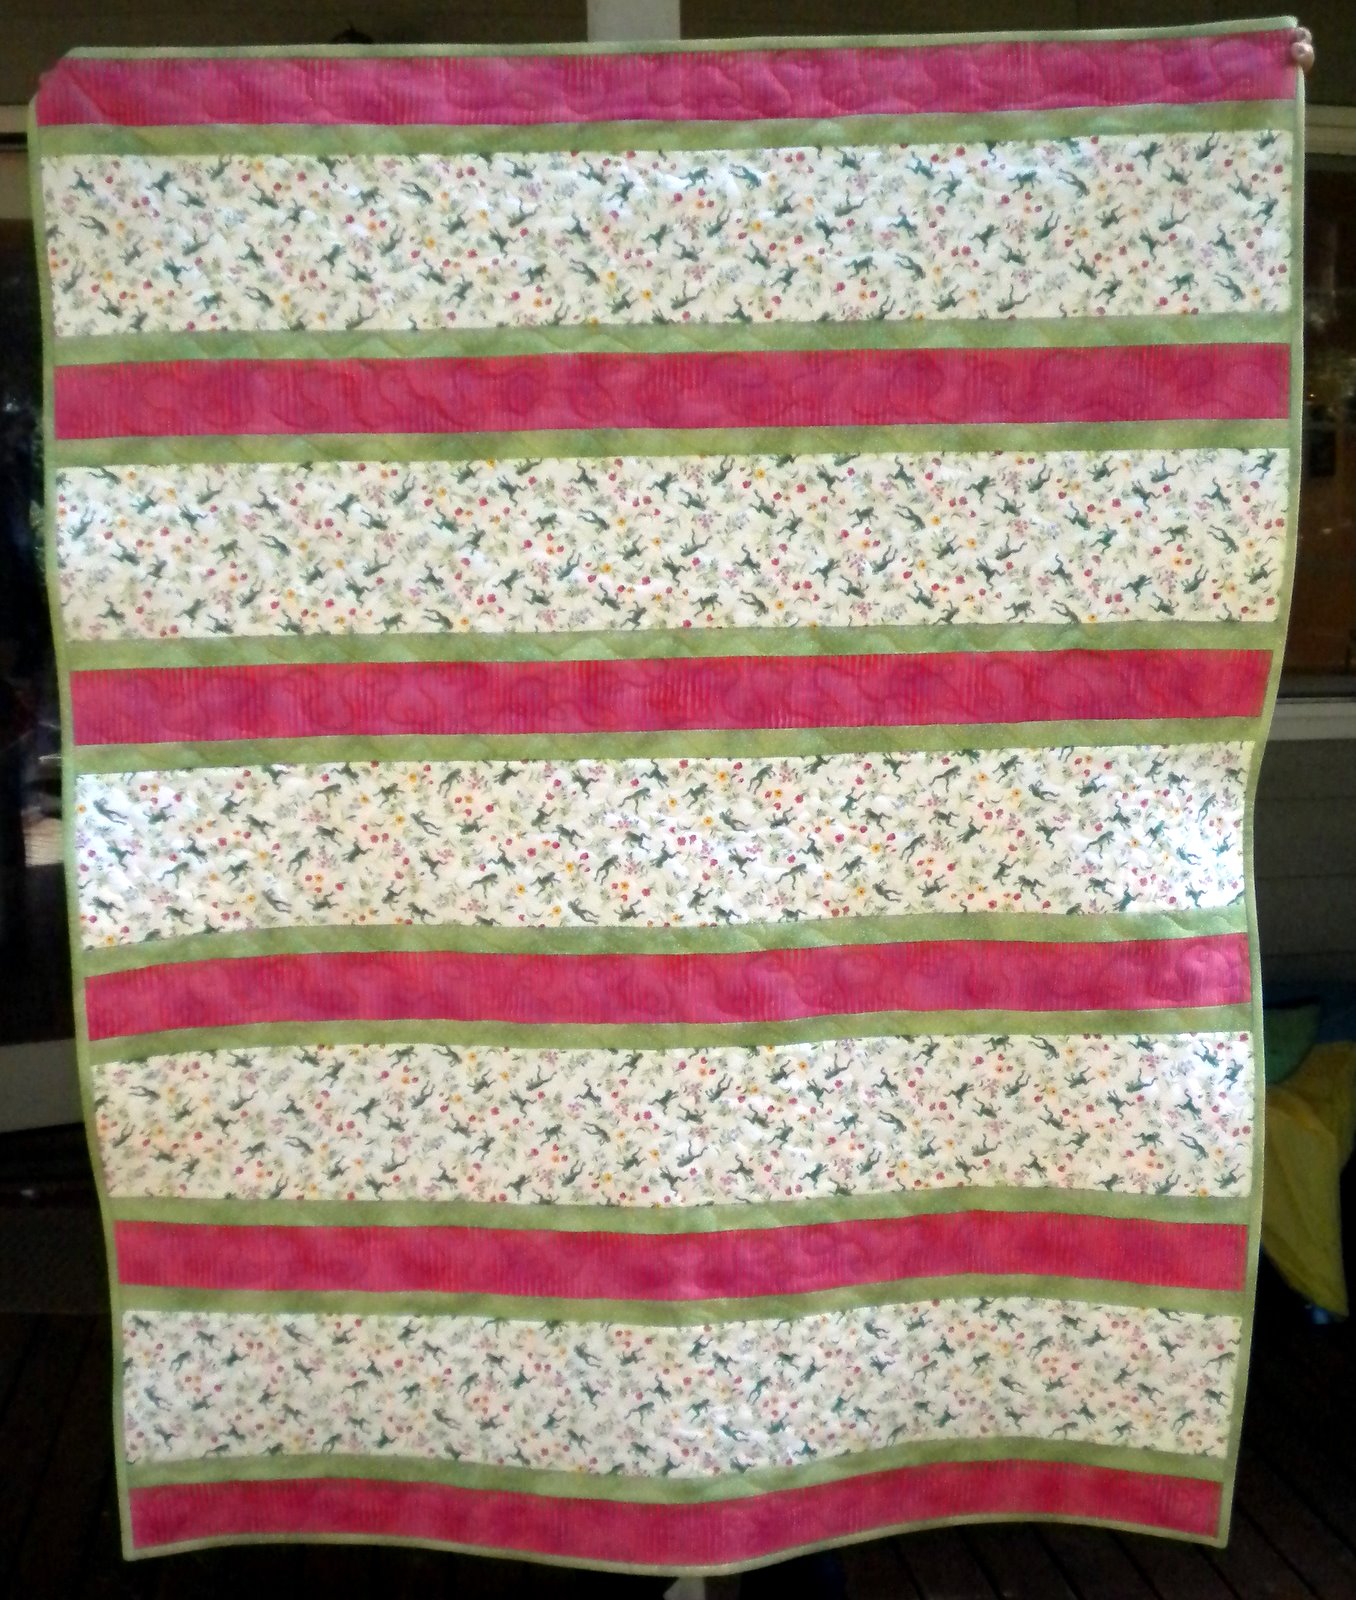
And speaking of which (and just so I don't have a post without pictures!) here's my latest PL donation quilt, which I finished last month. It's the second 'baste as you go' quilt that I started back in July. I wish I had paid attention to the repeat on the focus fabric when I put it together, but it's hard to see the overall pattern until you step away from the quilt. Oh well! I'll know to keep an eye out for that next time.


This is the fifth Quick Strippie quilt I've made, and I have 4 more in the works (they're on the big list!). They are just so easy to make!


And of course, my usual big crazy patchwork backing. Also fun and easy to make, and a great use for random scraps of novelty fabrics!

Tuesday, February 15, 2011

valentine's day project #2

Another new project that wasn't on the list... When I saw this cute wall hanging over at Nostalgic Cafe, I knew I wanted to make one. I had some 5" squares left over from my pink triangle quilt, and thought they would be perfect! I cut them into 2.5" squares, and used one of each print to make this little cutie!


The only bad thing was that I now had 3 more squares of each print! Following my new "create no UFOs" rule would mean tossing the extra squares into the scrap box. I couldn't bring myself to do that, so I went ahead and whipped up 3 more hearts (they don't take as long as you would think!), and sashed them together to make another wall hanging... In this shot, I have it laid out on the cutting table while I mark the diagonal lines (using one of the kid's washable markers - works great!).


I love how they turned out! For the little one, I used stippling in the white areas (dense in the heart area, more loose around the edge), and just some simple diagonals around the heart. I think this one will end up in my sewing room!


For the long one, I did an all over cross-hatch design.


This one will be hung on the narrow wall in the hall by the guest room. Probably year-round, until I can make more wall hangings to swap it out with! It's not TOO valentines-y, right?


And guess what... I still have more 5" squares left! To celebrate the finish of this mini project, I'd love to give this 'charm pack' to one of you. There's one each of 30-ish prints (a couple more than I used to make the wall hangings). Of course you don't have to make the same project that I did - it would make a cute little patchwork quilt for a baby girl!


Just leave any old comment (and I'm happy to ship international). I'll pick a winner on Thursday night, so hopefully I can get it in the mail on Friday! Yay for finished projects!!!

Monday, January 31, 2011

Happy new year!

Hi friends! My plan A (catch up on everyone else's blogs) didn't work, so I'm going with plan B (start fresh and hope y'all don't hold it against me!). I have no great excuse for not posting - just lots of little bumps in the road, like a new computer (my first Mac! and this old dog is not having fun learning new tricks!), minor illnesses, travels, internet outages, stressful work deadlines, you name it. But nothing serious - life is good here, and I'm so happy that the holidays are over and spring is on the way!

Before I start posting about my recent projects, I have one very overdue thank-you to take care of. Check out this fantastic apron that Amanda sent me!!! I just adore it. Every time I see it, I just want to blow off work and get all domestic in the kitchen! Thank you so much, Amanda! Oh, and go check out her shop - I bet if you asked nicely, she'd make an apron for you too!


Even though I've been neglecting this blog, I'm happy to report that I've been keeping myself busy with the thrifty/crafty stuff. My number one goal for 2011 is to finish up as many WIPs as I can, and to try like crazy not to start any new projects until I get the existing ones done. To keep myself on track, I started a list of all the projects I have in progress. Some are small (like individual bee blocks, or hanging up some miniquilts in my sewing room), but I'm writing down everything as I encounter it, and celebrating every item that I mark off. It's been very motivating for me!


I have a few holiday projects to show, but to heck with catching up chronologically. Instead, I'm going to start off with my most favorite project I've finished lately. You might remember some test blocks that I made last May, and this little table runner I whipped up:


I wasn't in love with it then. But now... I love, love, LOVE it. Behold!


It's going to live happily on my credenza (that's a 'fancy nancy' word for big filing cabinet). I love having something in my office that I made just for myself! And maybe it will help keep me from piling crap on top of there (um, not working at the moment, I have to confess!).


The back is just as pretty! I used one of my favorite vintage sheets, and the colors are perfect for the "tiffany" blue walls.


Now I just need to get busy on the actual bee quilt. I've received all my blocks from my bee partners, and I'm almost ready to start putting them together. It's on the big list! :-)

I have two other goals for 2011. My big list of projects includes a bunch of Project Linus quilts I've got cut out, and I'm hoping that I can use up all the polyester batting that's taking up WAY too much space in my closet. If I don't use it all by the end of the year, I'm going to donate the rest and be done with it.

My last big goal for the year is to blog regularly, and to reply to all the comments you wonderful friends leave for me. I do appreciate them, and I know I've sucked at this in the past. But I'm recommitting. Go ahead - try me! :-)

Saturday, December 18, 2010

still here...

Yes, I'm still here. Sorry for the incredibly long absence... I had a big work deadline this week, which slowly ramped up the pressure over the last month or so. On top of that, there were bouts of sickness, snow days, holidays, birthdays, feeble attempts to get ready for xmas... Blech. I know I should love this time of year, but I honestly don't.

And I know it doesn't take long to make a blog post, but... I'm also utterly behind on reading blogs. My reader had been pegged at 1000+ for weeks now!! I somehow feel wrong to post when I haven't caught up on all my friends' blogs (or even worse, emails). So, friends, please forgive me for not having my act together. I'm working on it. And if you soon get some comments on really old blog posts of yours, you'll know why!

Meanwhile, here's a little show and tell from last month. I finally finished the Project Linus quilt I started way back in July!


The standard crazy patchwork back...


I did all the quilting at the November PL meeting (killing two birds with one stone!), and it was pretty interesting to do the quilting in front of a room full of people. I was surprised that so many of them had never done free-motion quilting! I'm no expert, but I did my best to demonstrate, and answered lots of questions.


I did stippling in the large strips, and tried a couple new-to-me things in the narrower strips. The loopy quilting in the pink strip was fun, and I did okay on that. The wavy quilting in the green strip, on the other hand... not so great! I think I was getting tired and sloppy by the time I got to that. Oh well, it was good to try it out anyway!


Sorry again for dropping off for a while. I'll try to do better in the future. :-)

Monday, October 4, 2010

Happy 4th of July!

[First of all, thanks to all 3 of you who raised your hand for the flannel scraps giveaway! I was happy to have any takers at all! Congrats to #2, Pam of Warm Hugs Design! Send me your address and I'll get those scraps in the mail to you!]

And now, another finish!! I'm only a little late on this one... It's a table topper that I started way back in July - a birthday present for my stepmom, Claudia. I'm so happy to have it done in time to hand-deliver it when we visit my family in Texas later this week. Claudia loves to decorate for holidays, so I think she'll really like it. My dad is a former Army guy, so he should at least appreciate the theme!


I'm so proud! It's really my first traditional quilt project, with REAL blocks, and sashing and cornerstones and everything! And I kinda love it - all the fabrics came from my stash, but they came together so nicely. Every bit (except the star points) has stars - even the cream has a tiny star print! The design (such as it is - it's pretty simple!) is my own - I just made it up as I went.


I liked it so much, I made a tiny version to go with it!


I considered giving them both away together, but I'm going to be selfish and keep the little one. I want to start a wall of mini-quilts, and this will be my first one. Yay!


I love the stars... I was going to go wonky at first, but I'm glad I kept it traditional. Well, maybe they're slightly wonky anyway... :-)


The quilting is just a free-motion stippling. It's been a while since I did any of that, so it was fun to get back in the groove. And nice to only have to do these small sizes! The mini is about 20" square, and the big one is about 36" square.


I thought about trying to make it dual-purpose by putting something Christmas-like on the back. After much mental debate, I settled on this snowflake print that matched the color of the binding, and did a plain back. I added little pockets on the corners, in case they want to hang it on the wall instead of using it on the table. I'm not sure it will work (I've never tried to hang a quilt before!), but I'd read about it somewhere and figured it wouldn't hurt to try! Hopefully the corners are subtle enough that the quilt can still be used upside down on the table at Christmas time.


So, it's a finish, and you know what that means - another giveaway!


How about a kit to make a little mini quilt of your own? Everything you need (except for batting) is included, and it's all cut to size and ready to piece. I'm not including any instructions for how to put it together, because I'm sure you can figure it out (you can always email me with questions). Oh, heh - I was just about to say that international shipping is okay, but duh! Oh wait, maybe some ex-pat would like a little reminder of home? Anyway, everyone is welcome to enter, just let me know if you're interested in your comment!

Saturday, October 2, 2010

up to my ears in flannel!

When I go out thrifting, I always keep an eye out for flannel fabric. I'm happy to find either scraps (usually left over from someone's pajama project), or whole pieces (pajama projects that never happened!). But a few weeks ago, I went to a garage sale and got a HUGE box of flannel for something like $5 or $10. It was a crazy amount of fabric - about 40 yards in all! It's not the most exciting fabric in the world, but I knew I could give it a good home and put it to use right away...


I collect all my flannel in a big bin, and every once in a while I go through and process it. This huge addition pushed me over the edge, and I felt like I was working on nothing but flannel all last month!

As I've blogged about before, I love to make swaddling blankets (look, a tutorial!), or use flannel for the backs of "quiltlets". So I first took all the big pieces of printed fabric, and cut them into swaddling blanket size (about 42" long) or quiltlet size (about 60" long). Then I took all the printed scraps, and cut them into 7" (if possible) or 6" (if not) squares. Then I cut up enough solids into 6 or 7" squares, to match up with the prints, and made rag blanket squares. I tried to find a tutorial for exactly how I make these, but all the ones I could find showed how to use batting inside. I just use a third flannel square (same size as the outer two squares), and sew a big "X" from corner to corner, through all 3 layers. I was an X-sewing machine!!

After I had a bazillion squares, and it was time to sew them into blankets. Here's the first one, with all unique squares. It's a 9x12 grid (so 108 different prints!), with about 3/4" seams, so about 50" by 70" in size, I think. This first picture is after snipping the seams, but before washing.


That one had a lot of girlie prints, so I wanted to do another one for a boy. I didn't have nearly as many boy prints, but I did have multiples of the prints I did have, so I grouped them into 9-patches.


And here they both are, after a couple long washes and dries. You would not believe the amount of lint these things generate when you wash them! But they are so soft and fluffy. And heavy - I love that!


Unfortunately, these blankets can't be given to Project Linus (because the lint can get into wounds and equipment, etc.). So, I'll soon be taking them with me to Texas when we go for a family reunion. The highlight of the reunion is an auction of handmade goods, and the proceeds from the auction fund the reunion for the next year. I love that! Last year, I donated this quilt, which sold for $84. The year before that, I did another rag quilt (like the girlie one here, but with 6" squares), and it sold for $125! I'll surely be lowering the price by bringing two quilts this time, but whatever. It's for family. :-)

Even after making these two quilts, I still have enough squares left for at least three more. I know, it's crazy! AND, I have a huge pile of swaddling blankets just waiting to be sewn up! But, yay, all my flannel is processed, and all I have left is a crate full of scraps less than 6 or 7" in one or both dimensions. My plan is to someday turn those into coin quilts for Project Linus.

Speaking of which... remember my idea about always having a giveaway when I have a major finish? Well, is anyone out there up for a grab-bag of flannel scraps? You could whip up some cozy patchwork rice warming bags, or some smaller cold/hot packs for kids for Christmas gifts! If you're interested, just say so in your comment, and I'll draw a name on Monday. This one is for US folks only, because it will be a big chubby flat rate envelope... The next one will be international, I promise!

Thursday, August 12, 2010

winner, and an overdue finish

Congrats to lucky #11 - that's Alexandra of Right-brain Release. She said she loves all colors, so I'll have fun putting together a multicolor set for her. And she's from Albuquerque - that's where my SIL lives! Thanks everyone for entering, and for all your nice comments about the pink quilt. It went off in the mail today (that card was such a hard one to write...).

I realized recently that I never shared pictures of my finished table quilt. You should have seen me standing on a chair, holding the camera over my head, trying to get a good action shot! This was the best I could manage...


The colors are so pretty!


It ended up being almost exactly the right size, even though I should have started with at least an extra 6 or 8" in both dimensions... Because I didn't have any extra width to trim, I ended up with a really wavy edge. Lesson learned!


I *love* the back! This print (also a sheet) is definitely one of my favorites. The large scale is not so great for piecing, but it makes an awesome back. I was so excited to find a couple more of these recently, and I can't wait to use them on future projects!


I wanted to say thank you once again to Mr. Monkeysuit (now blogging at Bread and Buttons) for the inspiration. Though to be honest, I have to admit that it's in storage for the moment. I didn't really think about how a table quilt would work with a pre-schooler who still likes to swirl yogurt around with her fingers, slurp her applesauce, etc. It pained me to see how quickly it got grungy. So, I'll just tuck it away for now and try it again in a few years. Meanwhile, maybe I should make a couple dozen matching placemats instead! :-)

Monday, August 9, 2010

pink quilt #2 done!

It's officially finished... Now I just need to stop procrastinating, and get it in the mail!


I went with Psalm 91:4, which Amy suggested:
"He will cover you with his feathers,
and under his wings you will find refuge;
his faithfulness will be your shield and rampart."

Thanks, Amy!


I ended up having to redo the label, and I was so bummed!! For my first few quilts, I used the Sharpies I had on hand (green and black), and had no problems with the label fading in the wash. So, I ordered a whole set of Sharpies in pretty colors. I made the label as usual, and washed and dried the quilt like normal, and this is what came out. The lighter the ink color, the more it faded!


Oh well. Looking on the bright side - I didn't really like the shape of the label anyway, so it gave me a chance to redo it. I went back to my trusty old Sharpies, and tried again. This time I washed and dried the label by itself before I attached it to the quilt (once bitten, twice shy - I hate ripping out stitching!). It looks so much better, with no fading at all. From now on, I'll just use the pretty colored pens for decoration and not for the actual text!


I was thinking it would be fun to start a tradition of having a little giveaway with each major quilt I finish. I love doing giveaways, and maybe it will help motivate me to finish what I start more quickly. I can only hope!

So, how about a charm pack of 70 6" vintage linen squares? You can add a "solid" (like the gingham I used here) and make a quilt just like this one! If you're interested, just leave a comment about what color(s) you'd like. If you choose a single color (pink, blue, green or yellow), I'll pick two each of 35 different prints. If you choose more than one color, I'll pick 70 different prints. International shipping is fine, and I'll pick a winner on Thursday evening.

Now I'm off to catch up on some bee blocks...

Sunday, June 27, 2010

a finish is a finish

I am WAY behind in my blogging (reading and writing), so I'll be playing catch up for a little while...

Let me start with this little Project Linus quilt I finished last week. And when I say finished, that's all I did! My friend Ahava was moving, and gave me a TON of scraps and miscellaneous sewing stuffs (how awesome, right?). Among the bits and pieces was this whole-cloth quilt UFO. It was already quilted, and just needed to be trimmed up and bound.


I was really excited that I finally got to use this fun fabric for the binding. It's some that I got from the cat lady estate sale, and I always thought it would make an awesome binding, but I've never had a quilt that was right for it. But this one was PERFECT - the colors were almost an exact match. Serendipity!


So here it is, all washed and ready to go. The back is flannel - so snuggly!


I love being able to turn someone else's UFO into a donation quilt. It's like a double bonus - a project is rescued, and a kid in need gets a quilt! If you have an old UFO in your closet that you know you'll likely never finish, why not donate it to your charity of choice? It will be one less thing on your "to do" list!